
Have you ever wondered, ‘Can you paint turtle shells?’ It’s a curious question that sparks the imagination and raises intriguing possibilities. Turtles, with their distinctive shells, are like nature’s canvases, each one unique in pattern and texture.
As regarding the question, you can paint turtle shells, but it’s not as simple as dipping a brush in paint and going to town. While it may seem like a fun idea to add some flair to these fascinating creatures, there are some important considerations to keep in mind.
Therefore, if you’re interested in painting turtle shells, consider seeking out opportunities to work with rehabilitated turtles or in educational settings where professionals can provide guidance and ensure the safety and well-being of the animals involved.
Different types of turtle shells and their characteristics
Turtle shells vary greatly across different species, but they generally fall into two main types: the bony shell of most turtles and the softer, more flexible shell of certain aquatic turtles. Here are some key types and characteristics:
- Carapace and Plastron: The bony shell of turtles consists of two main parts—the carapace (the top shell) and the plastron (the bottom shell). The carapace is typically dome-shaped and offers protection to the turtle’s vital organs. The plastron is flatter and often has hinges or openings for the turtle to retract its head and limbs.
- High-Domed Shell: Some turtles have a high-domed carapace, which provides excellent protection from predators. Tortoises, such as the Galápagos tortoise, are examples of species with this type of shell.
- Flattened Shell: Certain turtles have a flattened shell, which is advantageous for aquatic life. For example, the pancake tortoise has a thin, flattened shell that allows it to maneuver easily among rocks and crevices.
- Softshell Turtles: Softshell turtles have a leathery, flexible shell that lacks the hardness of typical turtle shells. This type of shell allows for greater flexibility and agility in the water. Softshell turtles, like the spiny softshell turtle, are well adapted for swimming and hunting.
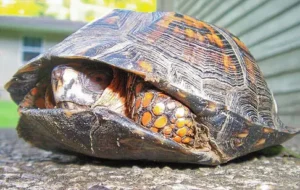
- Box Turtles: Box turtles have a unique shell structure that allows them to retract their head, tail, and limbs fully into the shell, effectively closing the openings. This provides excellent protection from predators.
- Terrapins: Terrapins are turtles that primarily inhabit brackish water habitats. They often have a relatively flat shell compared to freshwater turtles, allowing them to move more easily in their aquatic environments.
- Sea Turtles: Sea turtles have streamlined shells adapted for life in the ocean. Their shells are lighter and more hydrodynamic than those of freshwater and terrestrial turtles, facilitating swimming over long distances.
- Musk Turtles: Musk turtles, also known as stinkpots, have a relatively small and rounded shell compared to other turtles. This compact shell allows them to move efficiently in muddy or swampy habitats.
These are just a few examples of the diverse range of turtle shells found in nature, each adapted to suit the lifestyle and habitat of the species.
Can you paint turtles shells?
Painting turtle shells is generally not recommended, as it can harm the turtle’s health and compromise the integrity of its shell. Turtle shells are composed of living tissue covered by keratin, similar to human fingernails.
Also, painting the shell can interfere with the shell’s ability to breathe and absorb sunlight, which are essential for maintaining its health. Additionally, chemicals in paint can be toxic to turtles if ingested or absorbed through their skin.
However, if you’re interested in decorating a non-living replica of a turtle shell for educational or artistic purposes, you can use safe materials and techniques. Here’s a general guide on how to paint a replica turtle shell:
- Choose a Suitable Replica: Select a replica turtle shell made from a non-toxic, durable material such as plastic or resin. Ensure that the surface is clean and free of any dust or debris.
- Prepare the Surface: Lightly sand the surface of the replica shell to create a rough texture, which will help the paint adhere better. Wipe away any dust with a damp cloth and allow the shell to dry completely.
- Prime the Surface (Optional): If the replica shell is made of a porous material or if you’re using acrylic paint, consider applying a primer designed for the specific material. This will create a smooth, even base for painting and improve paint adhesion.
- Choose Safe Paints: Use non-toxic, water-based acrylic paints that are safe for use on children’s toys. Avoid oil-based paints or any paints containing harmful chemicals.
- Plan Your Design: Sketch your desired design onto the replica shell using a pencil. You can draw inspiration from real turtle shell patterns or create your own unique design.
- Paint the Base Coat: Start by applying a base coat of paint using a soft-bristled brush. Allow the base coat to dry completely before adding additional layers or details.
- Add Details and Patterns: Use fine-tipped paintbrushes or paint pens to add details, patterns, and colors to the shell. Take your time and work slowly to achieve the desired effect. You can reference photos of real turtle shells for guidance.
- Allow to Dry: Once you’ve finished painting, allow the shell to dry completely according to the manufacturer’s instructions. This may take several hours or overnight, depending on the type of paint used.
- Seal the Paint (Optional): To protect the paint and enhance its durability, consider applying a clear acrylic sealer designed for use on painted surfaces. Follow the manufacturer’s instructions for application and drying times.
- Display or Use with Care: Once the paint and sealer are fully dry, your painted replica turtle shell is ready to be displayed or used for educational purposes. Handle it with care to avoid scratching or chipping the paint.
Remember to prioritize the safety and well-being of real turtles, and avoid painting their shells under any circumstances.
Preparation for Painting
Before you start painting a replica turtle shell, it’s important to properly prepare the surface and gather all the necessary materials. Here’s a step-by-step guide for preparation:
- Choose a Suitable Replica: Select a replica or model of a turtle shell made from a material that is suitable for painting. Common options include plastic, resin, or papier-mâché. Ensure that the surface is clean and free of any dust or debris.
- Inspect the Shell: Before painting, carefully inspect the replica shell for any imperfections, rough spots, or dirt. If there are any visible defects, you may need to sand or smooth them out before painting.
- Clean the Surface: Use a mild detergent or soap and water to clean the surface of the replica shell. Gently scrub away any dirt, dust, or residue using a soft cloth or sponge. Rinse the shell thoroughly with clean water and allow it to dry completely.
- Sand the Surface (if needed): If the surface of the replica shell is rough or uneven, you may need to lightly sand it to create a smoother texture. Use fine-grit sandpaper and sand in gentle, circular motions until the surface feels smooth to the touch. Wipe away any dust with a damp cloth and allow the shell to dry completely.
- Protect Surrounding Area: Lay down a protective covering or drop cloth on your work surface to prevent any spills or mess. This will help protect your workspace and make cleanup easier.
- Gather Painting Materials: Collect all the materials you’ll need for painting, including non-toxic acrylic paints, assorted paintbrushes (fine-tipped brushes for detail work), water for rinsing brushes, a palette or disposable plate for mixing colors, and paper towels or cloth for cleaning brushes.
- Optional: Prime the Surface: Depending on the material of the replica shell and the type of paint you’ll be using, you may choose to apply a primer. A primer can help the paint adhere better and create a smoother finish. Use a primer suitable for the material of your replica shell and follow the manufacturer’s instructions for application and drying times.
- Plan Your Design: Before you start painting, spend some time planning your design. Sketch out your ideas on paper, and consider patterns, colors, and textures found in real turtle shells for inspiration. This will help guide your painting process and ensure that you achieve the desired result.
By properly preparing the surface and gathering all the necessary materials, you’ll be ready to start painting your replica turtle shell with confidence.
Step-by-step instructions for painting turtle shells
Painting a turtle shell should not be done on a real turtle, as it can be harmful to their health. However, if you’re looking to paint a replica or model of a turtle shell, here are step-by-step instructions:
Materials Needed:
- Replica or model of a turtle shell
- Non-toxic acrylic paints
- Assorted paintbrushes (fine-tipped brushes for detail work)
- Water for rinsing brushes
- Palette or disposable plate for mixing colors
- Paper towels or cloth for cleaning brushes
- Optional: Clear acrylic sealer for protection
Step-by-Step Guide:
- Prepare the Work Area: Lay down a protective covering on your work surface to prevent any spills or mess. Ensure proper ventilation in the area where you’ll be painting.
- Inspect the Replica Shell: Before painting, inspect the replica shell for any imperfections or dirt. Clean it gently with a damp cloth if necessary, and allow it to dry completely.
- Plan Your Design: Sketch out your design ideas on paper before you start painting. Consider patterns and colors found in real turtle shells for inspiration.
- Prime the Surface (Optional): Depending on the material of your replica shell and the type of paint you’re using, you may choose to apply a primer. A primer can help the paint adhere better and create a smoother finish. Use a primer suitable for the material of your replica shell, and follow the manufacturer’s instructions for application and drying times.
- Apply Base Coat: Start by applying a base coat of paint to the entire surface of the replica shell. Choose a color that closely matches the base color of the turtle species you’re trying to replicate. Use a large brush to cover larger areas quickly and evenly. Allow the base coat to dry completely before proceeding.
- Add Details and Patterns: Once the base coat is dry, use smaller brushes to add details and patterns to the shell. Refer to your design sketches and real turtle shell patterns for guidance. Work slowly and carefully, layering colors and textures to create depth and dimension.
- Blend Colors: Use a dry brush or a slightly damp brush to blend colors seamlessly, especially if you’re creating gradient effects or intricate patterns.
- Allow to Dry: After adding all the details and patterns, allow the paint to dry completely before handling the replica shell or applying any additional layers of paint.
- Optional: Apply Clear Sealer: To protect the painted surface and enhance its durability, consider applying a clear acrylic sealer. Choose a sealer that is suitable for painted surfaces and follow the manufacturer’s instructions for application and drying times.
- Display or Use with Care: Once the paint and sealer (if used) are fully dry, your painted replica turtle shell is ready to be displayed or used for educational purposes. Handle it with care to avoid scratching or damaging the painted surface.
Remember to prioritize the safety and well-being of real turtles, and avoid painting their shells under any circumstances.
Common mistakes to avoid
Aftercare and Maintenance
After painting a replica turtle shell, proper aftercare and maintenance are essential to ensure its longevity and preserve its appearance. Here are some tips for aftercare and maintenance:
- Allow Sufficient Drying Time: After painting the replica shell and applying any sealant, allow it to dry completely according to the manufacturer’s instructions before handling or displaying it. This may take several hours or even days, depending on the type of paint and sealant used.
- Handle with Care: Handle the painted replica shell with care to avoid scratching, chipping, or damaging the painted surface. Avoid dropping or bumping the shell against hard surfaces, and always hold it by the edges or base to minimize contact with the painted areas.
- Avoid Exposure to Extreme Conditions: Keep the painted replica shell away from direct sunlight, heat sources, excessive moisture, and extreme temperatures, as these can cause the paint to fade, crack, or peel over time. Display the shell in a cool, dry area indoors to minimize exposure to environmental stressors.
- Regular Cleaning: Dust the painted replica shell regularly with a soft, dry cloth or a gentle duster to remove any dirt, dust, or debris that may accumulate on the surface. Avoid using harsh chemicals or abrasive cleaners, as these can damage the painted finish.
- Avoid Abrasive Materials: When cleaning the painted replica shell, avoid using abrasive materials or scrubbing too vigorously, as this can scratch or dull the painted surface. Stick to gentle cleaning methods to preserve the appearance of the paint.
- Inspect for Damage: Periodically inspect the painted replica shell for any signs of damage, such as chipping, cracking, or peeling paint. If any damage is detected, take prompt action to repair and touch up the affected areas to prevent further deterioration.
- Reapply Sealant (if needed): If the painted surface of the replica shell begins to show signs of wear or if the sealant wears off over time, consider reapplying a clear acrylic sealant to protect the paint and enhance its durability. Follow the manufacturer’s instructions for application and drying times.
- Store Properly: If you need to store the painted replica shell temporarily, choose a clean, dry storage area away from direct sunlight and temperature fluctuations. Wrap the shell in soft, protective material to prevent scratching or damage during storage.
By following these aftercare and maintenance tips, you can help preserve the appearance and integrity of your painted replica turtle shell for years to come, ensuring that it remains a beautiful and durable display piece.
Conclusion
Can you paint turtle shells can be a tempting idea for artistic expression or educational purposes, but it’s crucial to remember the well-being of real turtles. While painting replicas offers a safe alternative, careful preparation, proper materials, and attention to detail are key.
From surface preparation to aftercare, every step matters in creating a beautifully painted replica turtle shell that not only captivates but also respects the natural beauty of these magnificent creatures.